If you are reading this article, chances are you have had some unfortunate experiences with moss poles in the past. I’ve been there. I tried to make moss poles work in my houseplants for a couple of years, always ending up with hopelessly dry and crispy moss. Eventually, I gave up and destined my vining plants to a life sans climbing. Then, I had a lightbulb moment and realized that there must be such a thing as a self-watering moss pole – and I was right.
I wish I could say this was my original, brilliant idea but alas, much craftier plant people have come before me. However, this is my version. It’s simple, can be done in under an hour, and uses just a few supplies that you can find at any hardware store and nursery (or order online, no judgement here). Here’s how to make your own self-watering moss pole in just a few simple steps.
What is a moss pole?
A moss pole is a sturdy stick or pole that is coated in moss (usually sphagnum moss) and used to support vining houseplants as they climb upwards. Providing vining plants with a moss pole encourages vigorous growth and larger foliage.
*Please note, as an Amazon Associate I may earn a commission from qualifying Amazon purchases through my links.
RELATED: Top 10 Essential Products for Happy Houseplants
Benefits of a Self-Watering Moss Pole
Self-watering moss poles are amazing because they are low-maintenance. In order for a moss pole to be effective for your climbing plants, the moss needs to stay relatively moist rather than drying out. If you have all the time in the world to dedicate to your plants you may be able to mist your moss pole regularly enough to keep it moist. If so – kudos to you. But realistically many people just don’t have the time to do that, which is where self-watering moss poles come in. Simply fill the water reservoir every couple of days and let the pole do its thing, its practically fool-proof.
Plants That Love Moss Poles
Any plant with a climbing or vining growth habit will benefit from a moss pole since the pole mimics the conditions in their natural environment. If you have a monstera, climbing philodendron, or pothos you can provide them with a self-watering moss pole and watch their growth explode!
How it Works
Self watering moss poles work thanks to the scientific principle of capillary action, or wicking. Capillary action is defined as “the process of a liquid flowing in a narrow space without the assistance of, or even in opposition to, external forces like gravity.” An example of capillary action/wicking is putting the end of a string in water and watching the rest of the string get wet as well. In fact, this exact example is how self-watering moss poles work.
What You Need
- 3/4″ or 1/2″ PVC Pipe
- 3/4″ or 1/2″ PVC Pipe Cap
- Electrical Tape or Duct Tape
- Sphagnum Moss
- Macrame Cord
- Fishing Line
- Twist Ties
Instructions
Step 1: Add the Cap to the End of the PVC Pipe
I used electrical tape to secure the cap on the pipe. This is the end of the pole that will be pressed down into the dirt. The cap prevents the water from flowing out of the moss pole into the soil. Using tape on top of the cap is probably optional, but since we will be filling the PVC pipe with water at the end of this tutorial it felt like a good idea to reinforce it.


Step 2: Soak the Sphagnum Moss
Dried sphagnum moss needs to be rehydrated before its used. While you complete the rest of the steps in this tutorial, soak the sphagnum moss in a bowl filled with water.

Step 3: Wrap the PVC Pipe With the Cord
Take the macrame cord and drop the end of the cord into the open end of the PVC pipe (the top) – feeding it down the tube until the cord hits the bottom. Tape the cord at the top of the pipe on the outside as seen below (this is to make sure the wick doesn’t get pulled from the water). Then, wrap the entire outside of the PVC pipe with the macrame cord. Don’t cut the cord at any point in this process. The entire length of cord needs to be intact from the inside of the pipe to the outside in order to properly wick the water.

Step 4: Secure Cord with Tape
As you go, secure the cord every foot or so with electrical tape or duct tape (again – no cutting!) to help keep the cord in place. Measure how tall your plant’s pot is and then leave the bottom of the PVC pipe without macrame where the pipe will be pushed down into the soil.

Step 5: Add the Sphagnum Moss to the PVC Pipe
This is the time-intensive part of the process. Wring out as much water as you can from the sphagnum moss so it is moist but not soaking. Then, begin adding it around the PVC pipe – securing it with fishing line as you go. You will need to wrap each new moss addition with fishing line several times in order to keep it in place. Leave the very top of the PVC pipe open (don’t patch it with moss) as this will be where the water will be added, as well as the bottom of the PVC pipe where the pipe will be pushed down into the soil.

Step 6: Add the Completed Pole to Your Plant’s Pot
Now the fun part! Add the completed moss pole to your plant’s pot – pushing the pole down as far as you can into the pot. Then, use the twist ties to secure your plant to the pole, including any existing aerial roots. Eventually the plant will begin to climb the pole by itself, but it will need some encouraging at first.


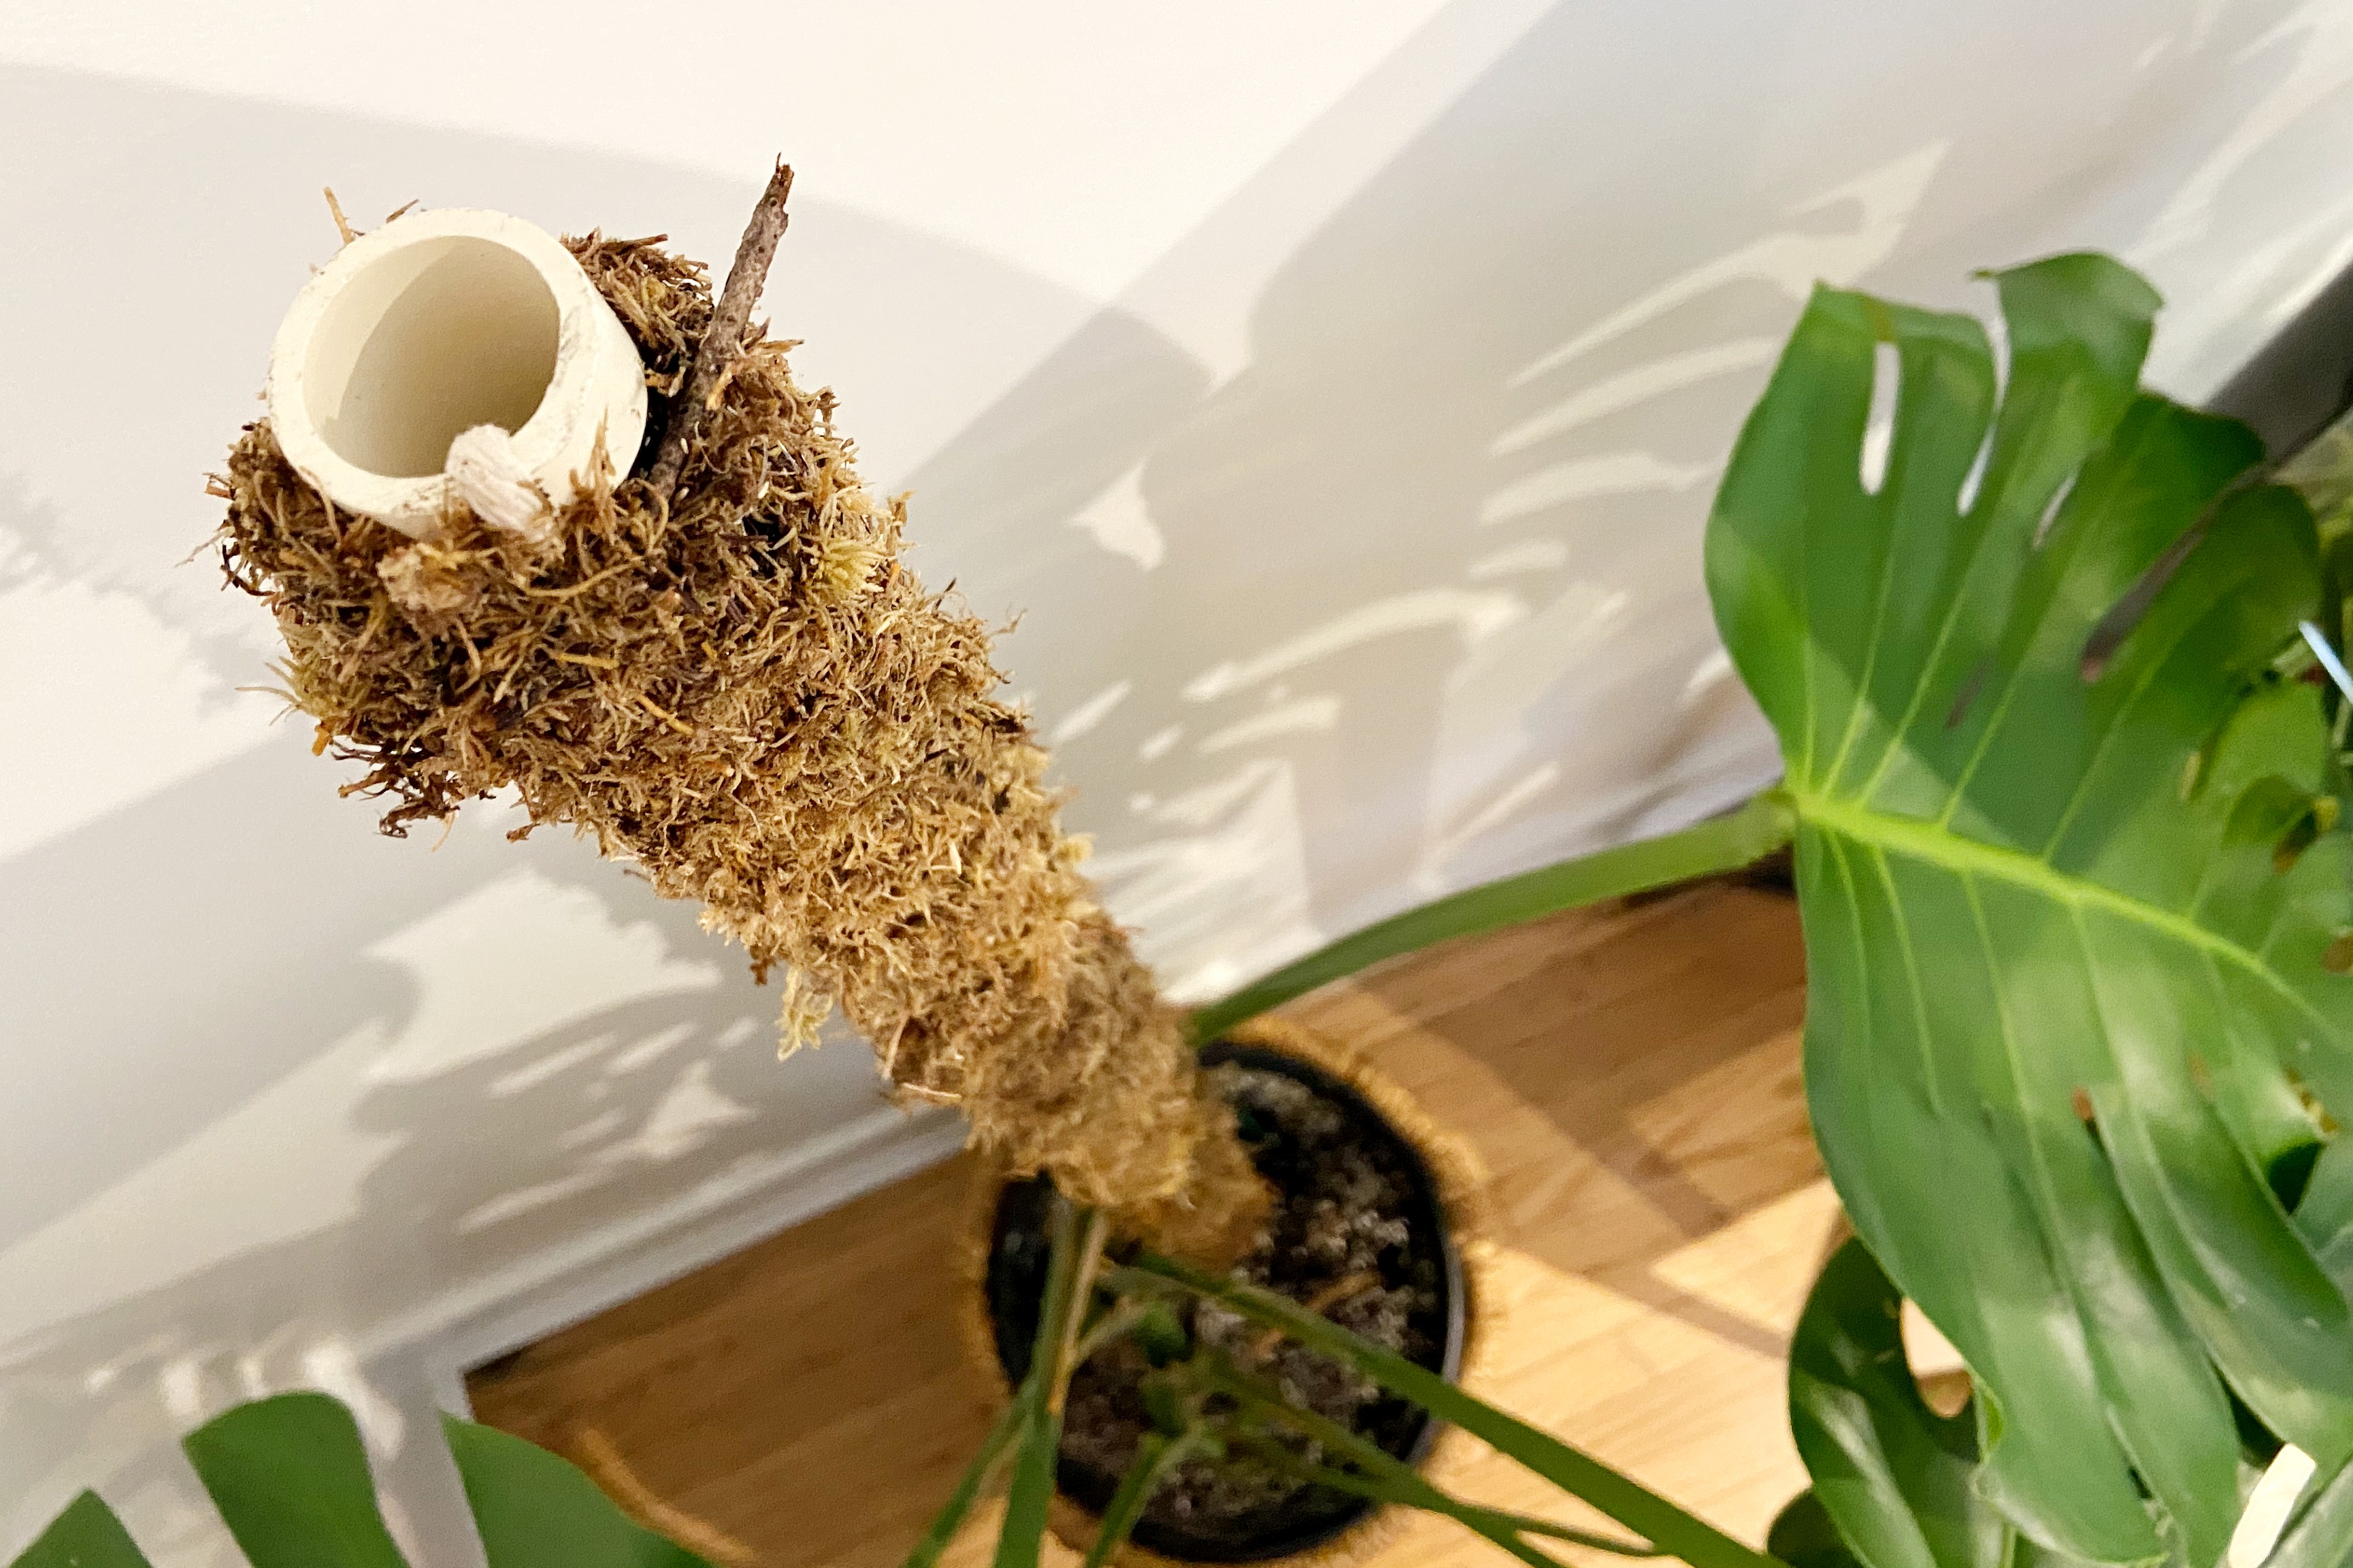
Step 7: Fill With Water
Lastly, take a watering can and fill the PVC pipe with water! The macrame cord that was draped down through the pipe at the beginning of this tutorial will act as a wick for the water, pulling it out of the pipe and down the length of the pole to keep the moss consistently moist. Ensure that you refill the pipe regularly to prevent your pole from drying out.

READ NEXT:
One response to “Easy DIY Self-Watering Moss Pole”
What a clever idea! I love it.